Automate It!
In the previous chapter, a few changes were made to our code that was already packaged in a container. To create a new container, we had to go through all the manual build steps again. That's just boring so let's bring in some automation!
There are many ways to automatically build a new Docker image and I will show one of the more common approaches. We will do the following:
- Use git for version control and a public GitHub repository
- We will remove all configuration items from our code such as the hostname and key of the Redis server
- We will use a CI/CD (continuous integration/continuous deployment) platform to automatically build a Docker image when we commit code to the GitHub repository
We will use only a fraction of the capabilities of GitHub and the CI/CD platform but if you have never worked with either, it will be enough to get your feet wet.
Version Control
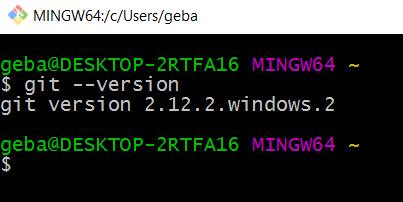
This chapter was written on Windows 10. To be able to use the command line git tool, first download Git for Windows from this location: https://git-scm.com/downloads. You will get a bunch of questions during installation, but you can get away with accepting the defaults for the examples that follow. After installation, launch Git Bash and type:
git --version
On my system, this looks like:
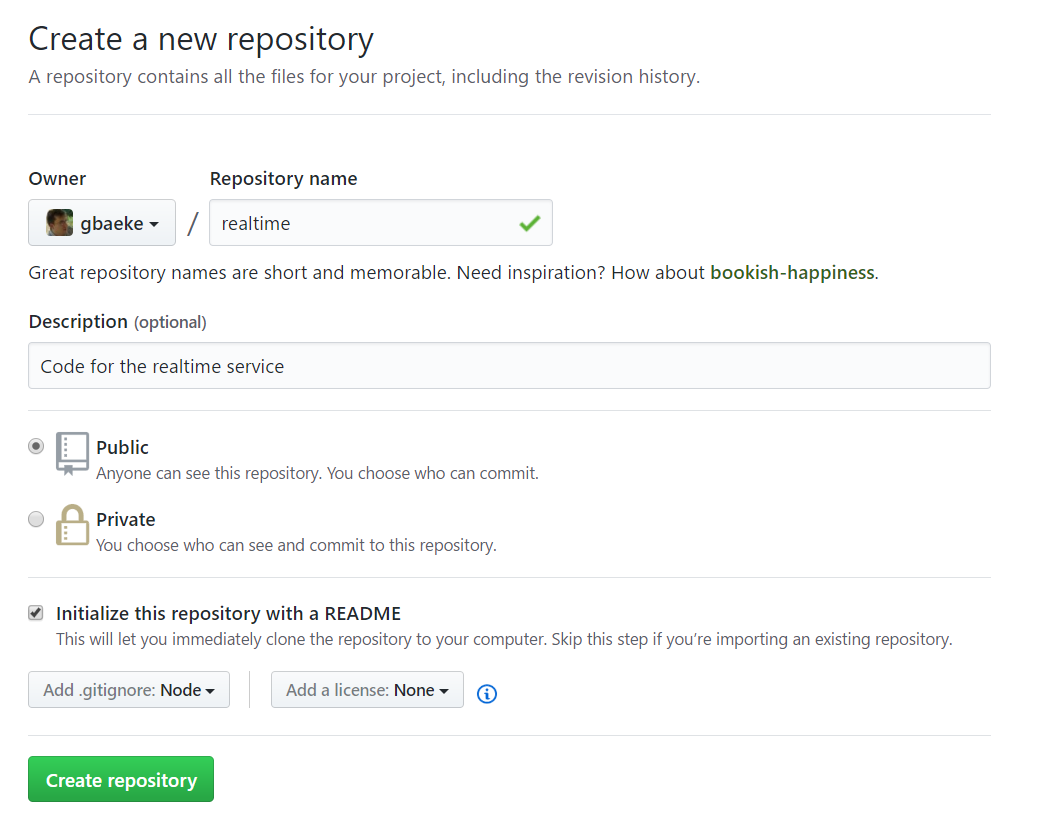
Our ultimate goal is to easily put our code on a public GitHub repository, so make sure you get an account at https://github.com. My account can be viewed at https://github.com/gbaeke. The realtime repository is here: https://github.com/gbaeke/realtime.
On GitHub, create a new repository (repo) and call it realtime. Below you can see the options I set when creating the repo:
- set the repo public
- added a README
- added a .gitignore file for Node.js which adds common files that should not be uploaded to this repository; you can add your own files to ignore later
You will see a button labeled Clone or download. When clicked, the web URL for the repo is shown:
https://github.com/gbaeke/realtime.git
The only thing you need to do now, is to clone the repository to your local computer. First, create a folder where you would like this repository to be cloned and make it the working folder in your Git Bash prompt. Then type:
git clone https://github.com/gbaeke/realtime.git
The result is shown below (working folder was ~/iotbook; cloned repo will be in ~/iotbook/realtime).

Change your working directory to the realtime folder. You will see the Git Bash prompt indicating you are in a folder controlled by git. You should see master, which indicates the branch your are working in. If that does not make sense, don't worry. You do not need to understand the concept of branches to follow along.
Now copy the index.js, index.html and package.json files that were introduced in the Realtime service chapter to the realtime folder. To make our life a bit easier, you can start Visual Studio Code which has great support for git. Open the View menu and select Git. In the Git window, type initial commit in the textbox and press CTRL-Enter. Note that if you do not see changed files in the list of changes, restart Visual Studio Code.
You have now committed changed files to your local repository. To get these files to GitHub, they need to be pushed to your GitHub repo. In Visual Studio Code, you can press CTRL-SHIFT-P and then type git push followed by Enter to push the files to the remote repository.
To push the files to GitHub from the command line, use the following commands in Git Bash from the cloned folder (realtime):
git add .

git status

git commit -m "messaged describing the commit"

git push
The above commands to the following:
- add all files to your repository (git add .); files and folders such as node_modules will be skipped because of .gitignore
- check the status (git status)
- commit the changes to your (local) repository (git commit)
- push changes from local repository to the remote (git push; remote location was configured during git clone)
You can now make changes to the application and test them locally. To get the changes to GitHub, either use Visual Studio Code or the git command.
Remove Configuration
It is not a good practice to have configuration items such as a hostname or a security key in your source code. Let's remove them from the code and use environment variables instead. You can change the code as shown below:
var express = require('express');
var path = require('path');
var app= express();
var server = require('http').Server(app);
var io = require('socket.io')(server, { origins: '*:*'});
var port = process.env.PORT||8888;


var subscriber=require("redis").createClient(6380, process.env.REDISHOST,
    {auth_pass: process.env.REDISKEY,
     tls: {servername:  process.env.REDISHOST}});


app.get('/', function(req,res,next){
    res.sendFile(__dirname + '/index.html');
});


io.sockets.on('connection', function(socket){
    console.log("Connection from " + socket.id);
    socket.on('channel', function(channel){
        console.log('Message from client for: ' + channel);
        socket.join(channel);
    });
});

subscriber.on("pmessage", function(pattern,channel, message){
    console.log("Message from " + channel + " was: " + message);
    io.sockets.in(channel).emit('message', message);
});

subscriber.on('error', function(err) {
    console.log('An error occurred ' + err);
});

subscriber.psubscribe("*");


server.listen(port, function() {
    console.log('Listening on port ' + port);

});
Environment variables in the above code are:
- PORT: to set the port this application should listen on; in Azure App Service, the default port is 80
- REDISHOST: the hostname of Azure Redis Cache (e.g. gebaredis.redis.cache.windows.net)
- REDISKEY: the key to securely connect to Redis
To test the above code, make sure you first set the environment variables. On Linux and Mac, you can set the variables and run the application with one command:
REDISHOST=<hostname> REDISKEY=<key> npm start
Tip: the above command will also work in Git Bash on Windows and of course also in Bash for Windows on Windows 10
As was shown in the Ship It! section, the application runs in a container on Azure App Service. You will have to set the app settings REDISHOST and REDISKEY in Azure App Service. The settings will be available to the code as environment variables.
Autobuild the image
Now that the code can be changed locally and pushed to GitHub with a few simple commands, it is time to automatically build a new Docker image and update the image in Azure Container Registry. Although Visual Studio Team Services is one option to do so, I will show you how to do it with Shippable, an easy to use DevOps platform that has a free option.
To use Shippable, head over there and log on with your GitHub credentials. With a view on your subscription, click Enable Project and enable the realtime project.
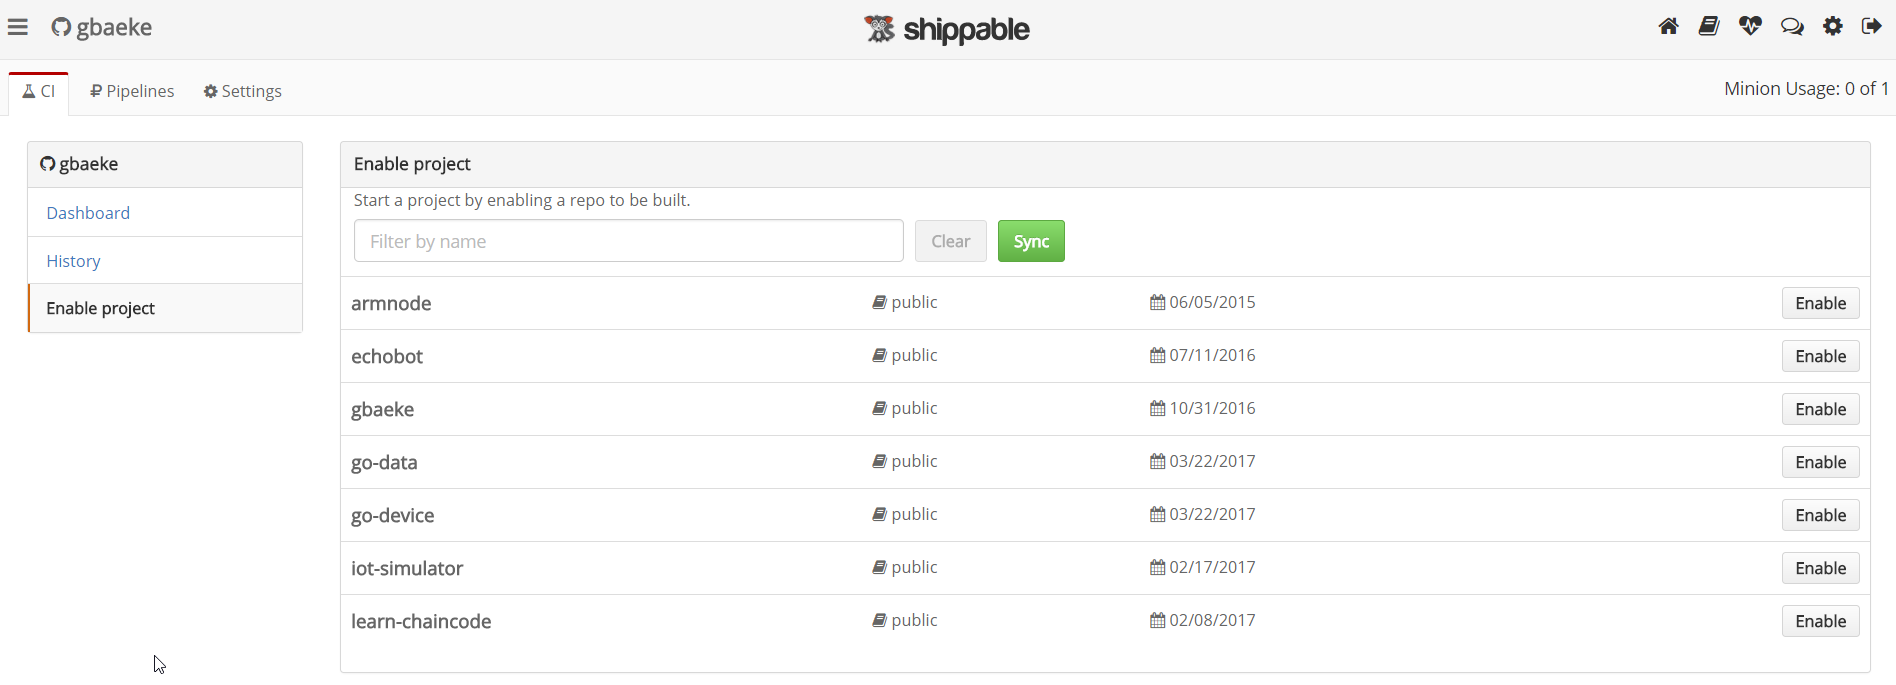
After enabling your project, the details will be shown:

In the above screenshot, my project is shown with a couple of builds already. Note that a build will be automatically triggered when you push changes to GitHub. You can also build manually by clicking the Build button.
Don't click the Build button yet though! We still need to define how Shippable should build our project. This is what we want to do:
- Build a new container image based on our code in the repo
- Push the container image to Azure Container Registry
To control the build process, Shippable uses a shippable.yml file that you put in your repository. Add the following file to the realtime folder on your local machine:
language: none

integrations:
    hub:
        - integrationName: "gebaacr"
          type: "private docker registry"

branches:
  only:
    - master

build:
    ci:
        - echo 'CI running'
        - export IMAGE_NAME=gebaacr.azurecr.io/rt
        - ./build.sh

    post_ci:
        - ./push.sh
Let's go through the above file, step-by-step:
- language is set to none; we don't have any language specific needs in our build process
- use an integration of type private docker registry; we want to push our image to Azure Container Service which acts as a private docker registry with custom credentials; the credentials are set in an integration you create on the Shippable website (see below)
- we only act on the master branch
- the build process has steps; we only use two
- ci
- post_ci: runs after ci
As you have noticed, you use standard Linux commands in the ci and post_ci steps:
- ci: set an environment variable IMAGE_NAME that references the private registry and the repository (rt); next call a shell script called build.sh
- post_ci: call a shell script called push.sh
The shell scripts should also be put in the realtime folder so they are available on GitHub as well. If they are on GitHub, Shippable can pull them in to execute them. Make sure that the shell scripts are executable!
This is the contents of the build script (put it in your realtime folder):
#!/bin/bash -e

if [ "$IS_PULL_REQUEST" != true ]; then
  sudo docker build -t $IMAGE_NAME:latest .
else
  echo "skipping because it's a PR"
fi
The above script, as an example, does some extra checking (is it a pull request?). Based on the check the image is built or not. If you do not need extra checks, just put the docker build command directly in shippable.yml.
The push script is very similar (put it in your realtime folder):
#!/bin/bash -e
if [ "$IS_PULL_REQUEST" != true ]; then
  sudo docker push $IMAGE_NAME:latest
else
  echo "skipping because it's a PR"
fi
As with the build script, if you do not need extra checks, just put the docker push command in shippable.yml directly. As you can see in the above script, there is no login to the private docker registry. The hub integration in shippable.yml references an integration we created on the Shippable site.
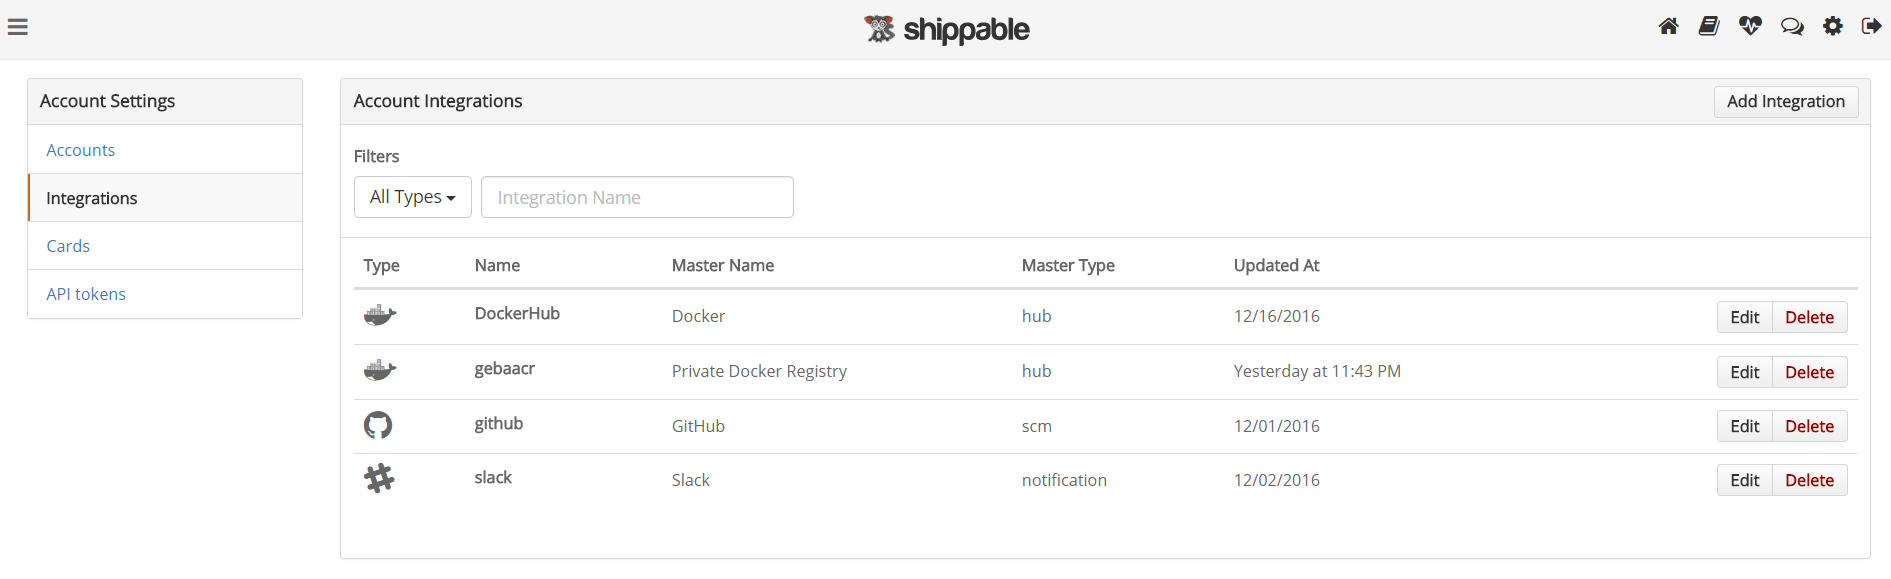
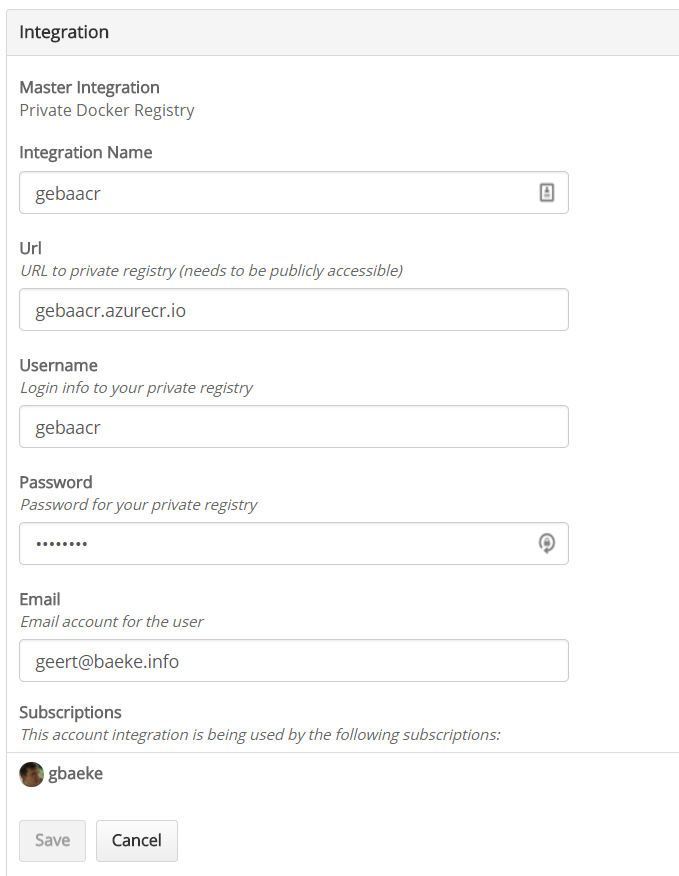
By clicking the settings icon at the top of the screen, you can add the integration. Create an integration of type Private Docker Registry and link it to your subscription. Without linking, you cannot use the integration in your yml file. My integration is shown below:
With the shippable.yml and both shell scripts in the realtime folder the work is almost done. If Shippable has to build an image, it needs a Dockerfile. Add the Dockerfile from the Ship It! section to the realtime folder. Here it is again for reference:
FROM node:alpine
MAINTAINER <your_name_here>


# create app directory
RUN mkdir -p /usr/src/app
WORKDIR /usr/src/app

# install dependencies
COPY package.json /usr/src/app
RUN npm install

# copy app sources
COPY index.js /usr/src/app
COPY index.html /usr/src/app

# expose not really needed here
EXPOSE 8888
CMD ["npm", "start"]
With all files in place, commit the changes to your local repo and then push the changes to GitHub. Shippable will pick this up and start building and pushing your container. You can track the actions Shippable performs by clicking on your project:

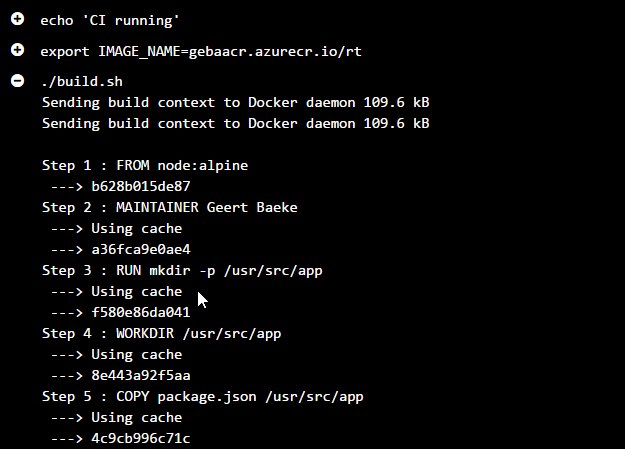
In the above screen, you see the results of the ninth build. By opening the steps in the process (click + icon) you can see details about your commands. If you click the + next to build.sh, for instance, you will see the output of that script:
Azure App Service
Note that, although we now have an automatic process in place to build and push a new image when our code changes, the container image in Azure App Service is not automatically updated. Until May 2017, the easiest way to update the image was stopping and starting the web app. With the Azure CLI 2.0, issue the following commands:
az appservice web show --name iot-rtweb --resource-group rtweb-rg

az appservice web stop --name iot-rtweb --resource-group rtweb-rg

az appservice web start --name iot-rtweb --resource-group rtweb-rg
Note that the first command just provides information about the web app such as its state (running, stopped). You will not get any indication about the container being updated after stopping and starting the web app. This was a shortcoming of container support on web apps.
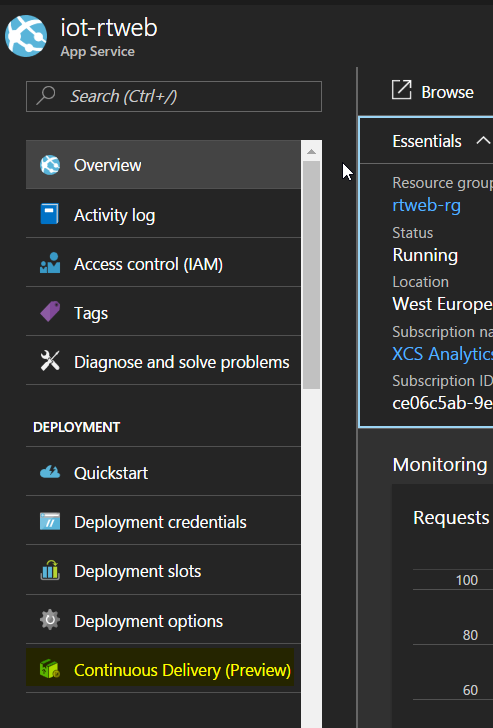
In May 2017, Microsoft introduced some changes to Azure Web App for Linux, including the ability to configure continuous delivery with Visual Studio Team Services. In our case, we can keep our code in GitHub and tell Visual Studio Team Services to build our container and push it to Azure Container Registry. To configure this feature, click Continuous Delivery in the Web app settings (it was still in preview at the time of writing):
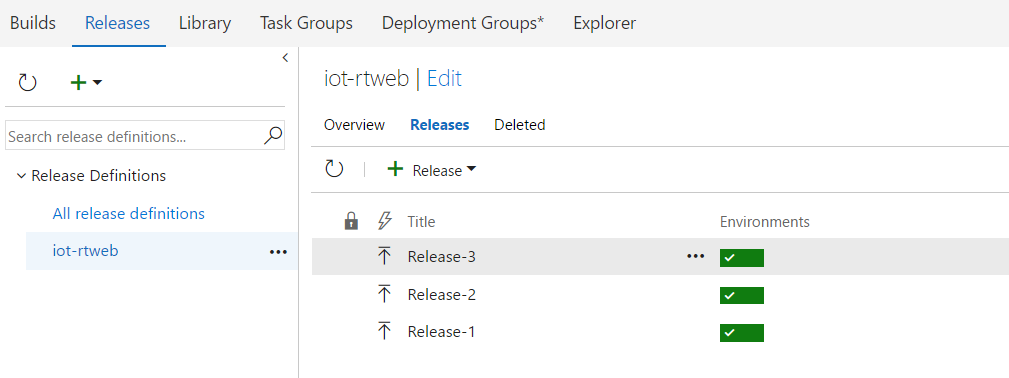
After the push, the container will be updated automatically. There is no need to configure anything in Visual Studio Team Services. When you update your code, a release will be scheduled. You can check the releases in the Visual Studio Team Services portal:
Another change that Microsoft introduced is the automatic detection of the port used by your container as defined in the Dockerfile. A port application setting takes precedence over the port defined in your Dockerfile.