Devices
IoT Hub requires you to define devices in advance with security settings such as symmetric keys or a certificate. If your device connects directly to IoT Hub, it will need to do so in a secure fashion. In this book, we will use the security keys instead of an X.509 certificate.
Let's first take a look at how to create devices. There are several options:
- Azure Portal
- Azure CLI 2.0
- Device Explorer
- PowerShell
- iothub-explorer: see https://www.npmjs.com/package/iothub-explorer
- REST APIs
In the following paragraphs, we will take a look at the first three options. The REST APIs are discussed in a separate section.
Create a device from the portal
The easiest way to create a device is via the Azure Portal. Open your IoT Hub and click Device Explorer:
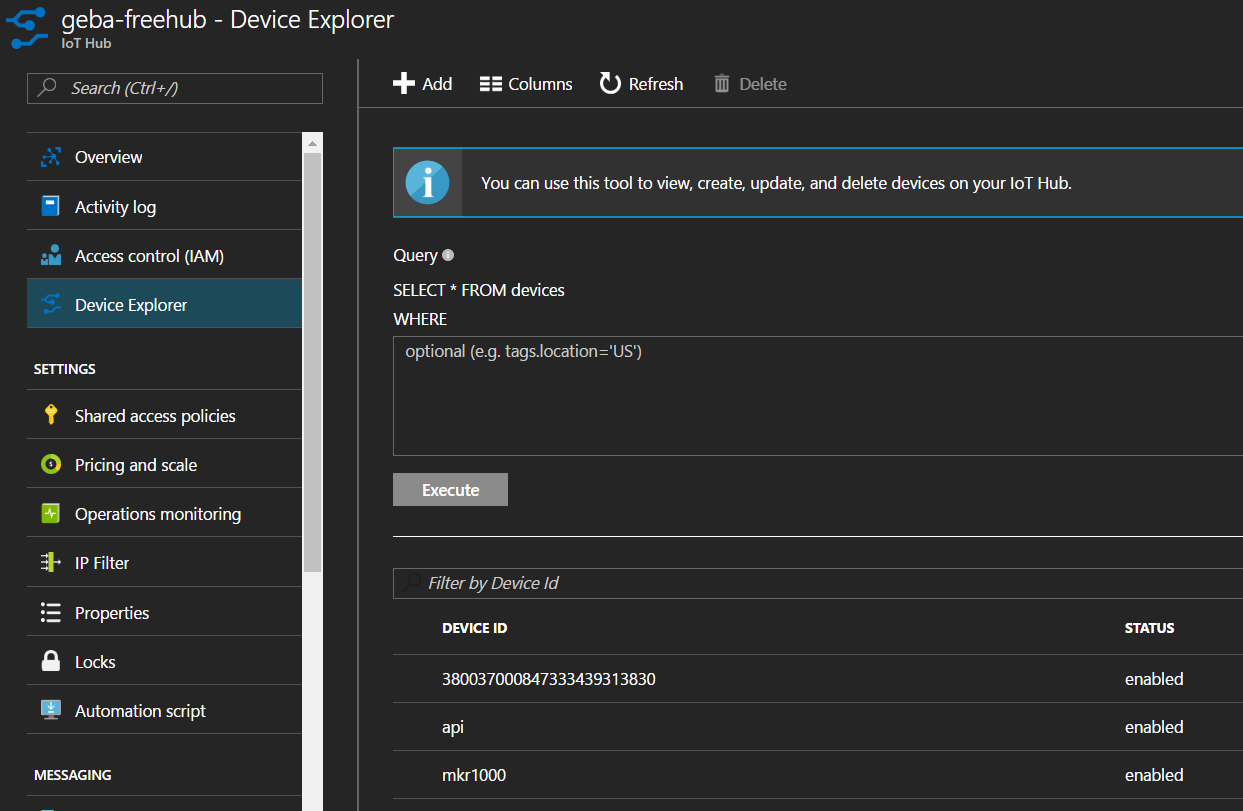 From Device Explorer, you can search for devices with a query or select your device from a (filtered) list. Go ahead and add a new device. You will be asked for the following settings:
- Device ID: you will use this device ID when you connect using HTTP or MQTT
- Authentication Type: select Symmetric Key
- Primary Key/Secondary Key: you can set these keys yourself but I recommend using the Auto Generate Keys option
- Connect device to IoT Hub: leave this setting at enabled; you can use this setting to disable a device and prevent its telemetry from entering the IoT Hub
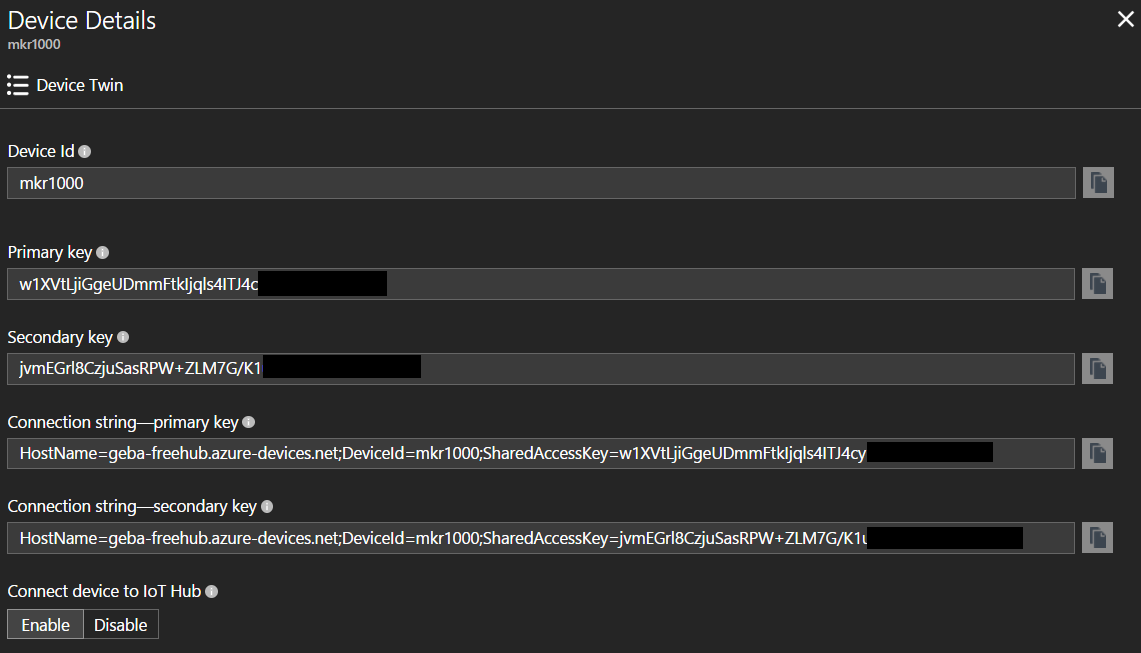
I created the device mkr1000 to be used later in a sketch. When you click on an existing device, you will see the Device Id and associated security information:
Create a device from the command line
Use Azure CLI 2.0 from your computer or the Bash Cloud Shell in the Azure Portal to list your IoT Hubs:
az iot hub list -o table
With the name of the IoT Hub and its resource group, create a new device with:
az iot device create --device-id DEVICEID --resource-group RESOURCEGROUP \
    --hub-name IOTHUBNAME
The above command will use the symmetric key option by default and also list the keys in the output. To see your devices:
az iot device list -g RESOURCEGROUP--hub-name IOTHUBNAME -o table
To get full details about a device:
az iot device show  --device-id DEVICEID -g RESOURCEGROUP \
    --hub-name IOTHUBNAME
To see the connection string:
az iot device show-connection-string  --device-id DEVICEID \
  -g RESOURCEGROUP--hub-name IOTHUBNAME
Create a device from Device Explorer
Device Explorer is a very handy tool to manage IoT Hub devices but also to see incoming data per device and even send messages to a device (cloud-to-device or C2D).
Install Device Explorer from GitHub and start it. From the properties of your IoT Hub in the Azure Portal, click Shared access policies and then click iothubowner. Click the clipboard icon next to the Connection string - primary key textbox and paste it in Device Explorer. Click Update to connect.
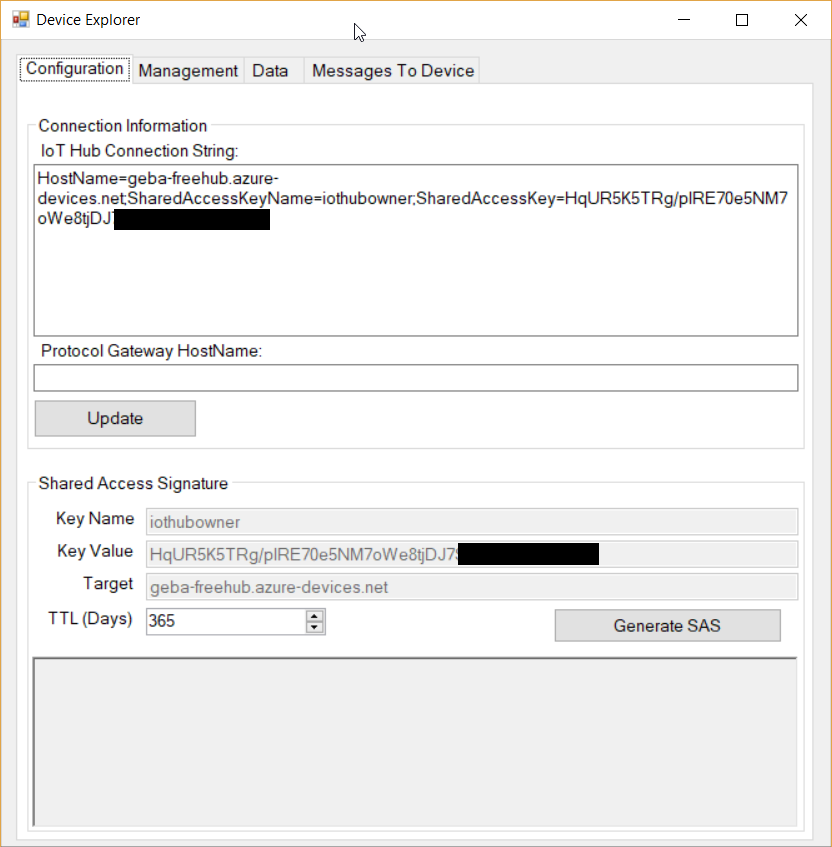
You can now click the Management tab and manage devices. To create a new device, simply click the Create button and follow the instructions. We will come back to Device Explorer later to view incoming messages from our device and to send a cloud-to-device message to our device.