MQTT
To connect to an MQTT server from a Particle device, there are some libraries available:
- MQTT: this library can be found at https://github.com/hirotakaster/MQTT and works well for unencrypted communications
- MQTT-TLS: this library can be found at https://github.com/hirotakaster/MQTT-TLS and can be used for encrypted communications
Experimenting with MQTT
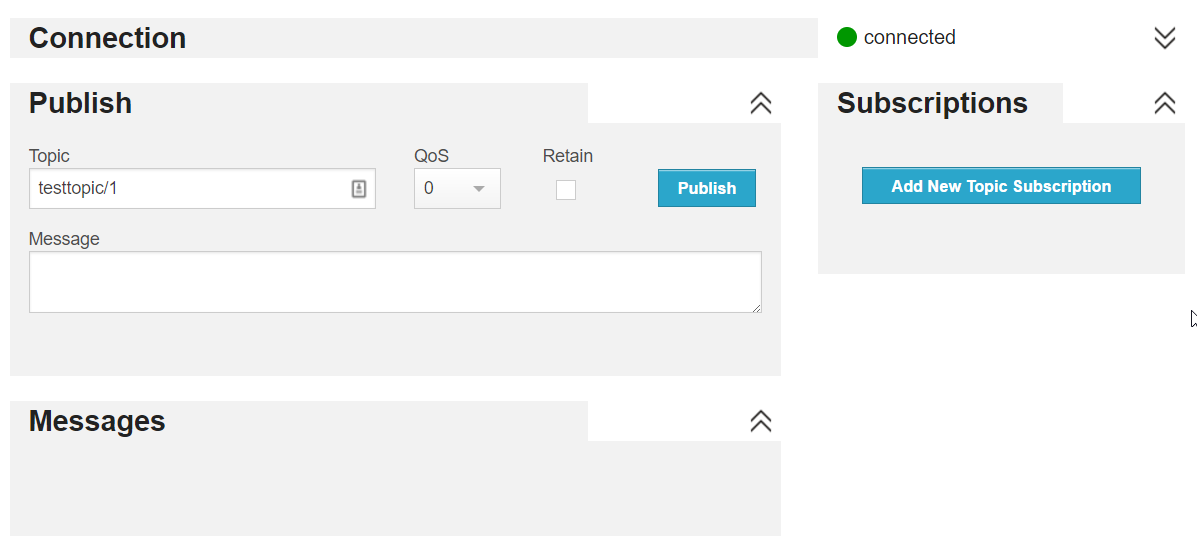
Before we start writing code, we will experiment with a public broker over at http://www.hivemq.com/try-out/. From that page, you can launch a WebSocket client to send and receive messages:

The address of their public broker and its WebSocket port is already filled in. Click the Connect button to connect to the server with the generated client ID:
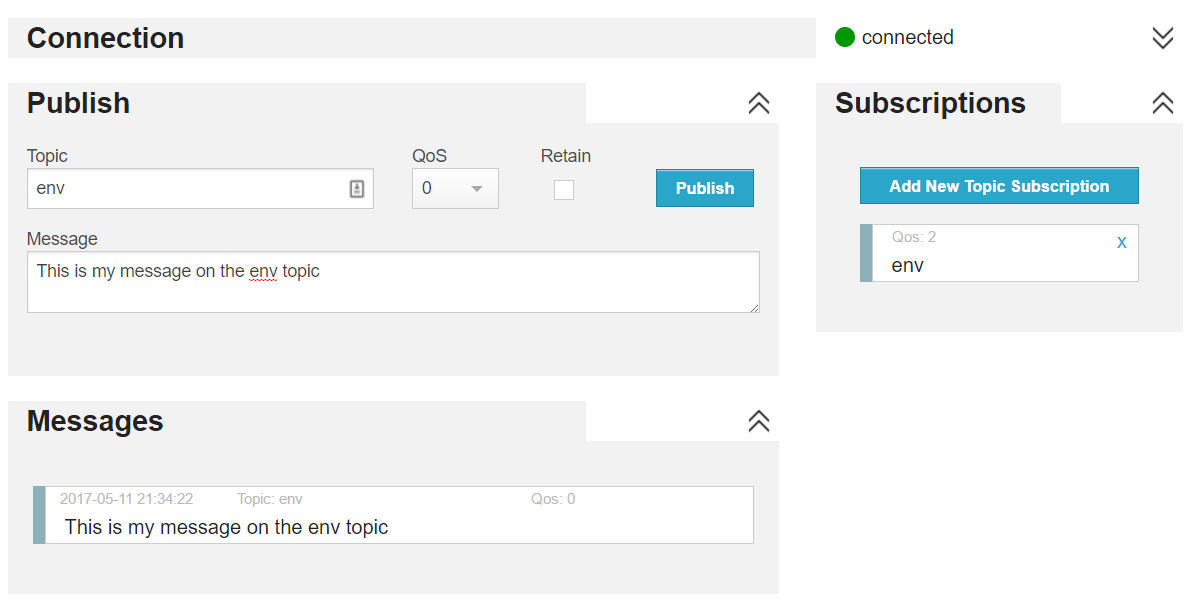
 An MQTT client has a persistent connection to the server to both send and receive messages. You send or publish messages to a topic and you subscribe to topics to receive messages on that topic. Subscribe to a topic called env with the default settings (like QoS) and then publish a message to the env topic to see it appear:
 A topic is not restricted to a single label. If, for example, you want to reflect the location of your sensor in the topic, you could use the following topic name:
belgium/antwerp/ahlersbuilding/floor6/oceanix/temperature
The slash (/) is a topic separator to separate the topic levels.Topic levels are case-sensitive and can contain spaces. Note that I do not recommend using spaces to avoid problems in your applications or when interacting with the MQTT broker from the command line. In addition, although you can start your topic with a /, you should avoid to do so.
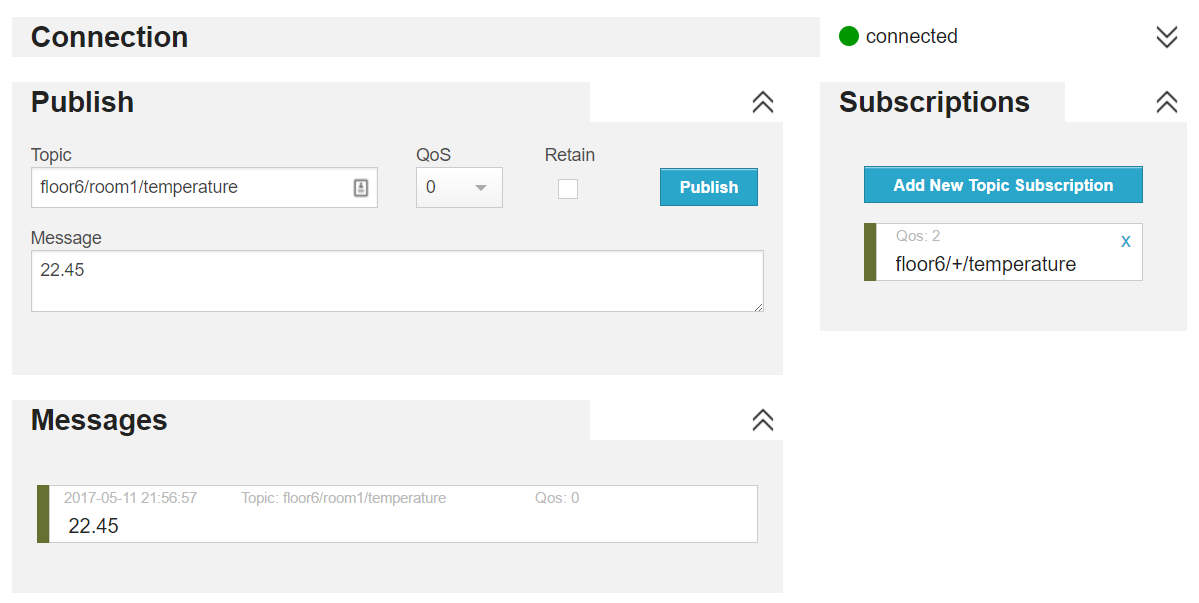
When you subscribe to a topic, you can use wildcards such as + and #.
- +: a single-level wildcard; you could subscribe to belgium/antwerp/ahlersbuilding/floor6/+/temperature to obtain temperature readings from all rooms on floor6
- #: a multi level wildcard always used at the end; you could subscribe to belgium/antwerp/# to obtain messages from all topics that start with belgium/antwerp
Let's try wildcards in the WebSocket client! Subscribe to topic floor6/+/temperature and then publish a message to topic floor6/room1/temperature. You should see the message appear:
 The MQTT client on a device will behave similarly to the WebSocket MQTT client in the browser. Messages can be published to any topic you choose. In addition, you can subscribe to topics as well, allowing you to receive messages from the broker and have your device do something. The MQTT client on the device allows you to setup a callback function that gets called whenever a message is received on a topic of your choosing.
Using the MQTT library
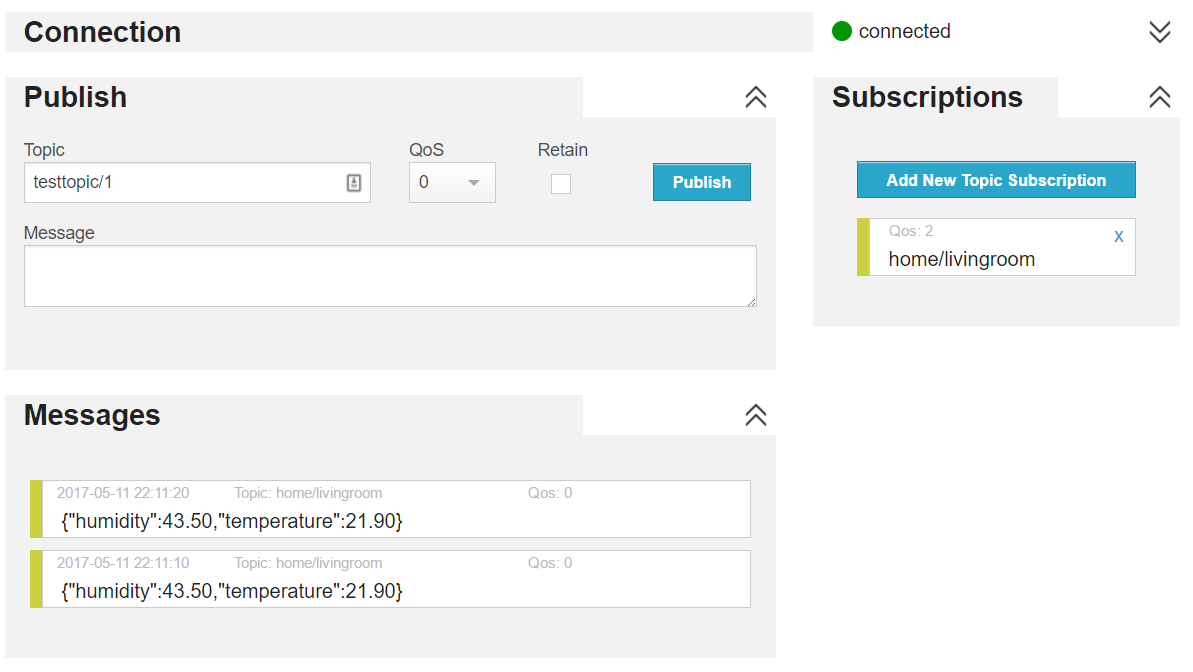
It is time to write some code for the Photon that publishes temperature and humidity data to the public broker. We will use the topic home/livingroom so subscribe to the topic from the WebSocket client to see your messages appear:
 The code for the Photon is shown below:
// This #include statement was automatically added by the Particle IDE.
#include <MQTT.h>

// This #include statement was automatically added by the Particle IDE.
#include <SparkJson.h>

// This #include statement was automatically added by the Particle IDE.
#include <Adafruit_DHT.h>

#define DHTPIN 1 // what pin we're connected to

#define DHTTYPE DHT22 // DHT 22 (AM2302)

// preallocated memory to reserve on the stack; use 200 bytes
StaticJsonBuffer<200> jsonBuffer;

// create a JSON object
JsonObject& root = jsonBuffer.createObject();

// Variables for humidity and temperature
double h, t;

DHT dht(DHTPIN, DHTTYPE);

// MQTT callback
void callback(char* topic, byte* payload, unsigned int length);

// MQTT client
MQTT client("broker.hivemq.com", 1883, callback);


void setup() {
    dht.begin();

    // Setup Particle variables
    Particle.variable("temperature", t);
    Particle.variable("humidity", h);

    // connect to MQTT server
    client.connect("particle_dust");

    // MQTT subscribe
    if(client.isConnected()) {
        client.subscribe("particle/callback");
    }


}

void loop() {
    // Wait a few seconds between measurements.
    delay(10000);

    // Reading temperature or humidity takes about 250 milliseconds!
    // Sensor readings may also be up to 2 seconds 'old' (its a
    // very slow sensor)
    h = dht.getHumidity();
    // Read temperature as Celsius
    t = dht.getTempCelcius();

    // Check if any reads failed and exit early (to try again).
    if (isnan(h) || isnan(t)) {
        return;
    }

    // fill JsonObject
    root["humidity"]=h;
    root["temperature"]=t;

    // generate the JSON string
    char output[200];
    root.printTo(output, sizeof(output));

    if(client.isConnected()) {
        client.publish("home/livingroom", output);
        client.loop();
        Particle.publish("MQTTSuccess", output, 60, PRIVATE);
    } else {
        Particle.publish("MQTTError", "Not Connected", 60, PRIVATE);
        client.connect("particle_dust");
    }
}

// MQTT call back function
void callback(char* topic, byte* payload, unsigned int length) {
    char p[length + 1];
    memcpy(p, payload, length);
    p[length] = NULL;

    // publish the payload to Particle
    Particle.publish("MQTTcallback", p, 60, PRIVATE);

    delay(1000);
}
The code above needs the following libraries; add them from the Build IDE:
- MQTT
- Adafruit_DHT
- SparkJson
The MQTT code is straightforward. First, the callback function is defined and the MQTT client is initialized:
// MQTT callback
void callback(char* topic, byte* payload, unsigned int length);

// MQTT client
MQTT client("broker.hivemq.com", 1883, callback);
Where the WebSocket clients connects to the WebSockets port (8000), a regular client that uses TCP connects to port 1833 for unencrypted traffic. During the client initialization, the callback is registered as well. You still have to subscribe to a topic though and that is done in setup():
// MQTT subscribe
if(client.isConnected()) {
   client.subscribe("particle/callback")
}
To publish messages, you use client.publish():
if(client.isConnected()) {
        client.publish("home/livingroom", output);
        client.loop();
        Particle.publish("MQTTSuccess", output, 60, PRIVATE);
    } else {
        Particle.publish("MQTTError", "Not Connected", 60, PRIVATE);
        client.connect("particle_dust");
    }
Note the client.loop() call. It is used to allow the library to look for incoming messages on subscribed topics and should be called in the main loop() function. The Particle.publish() calls are used for error and success logging.
Note that the code does not use authentication since the public broker does not require it. If you need to authenticate, you can use a variant of client.connect():
client.connect("particle_dust", "username", "password");
Obviously, an unencrypted connection with a username and password to a broker on the Internet is not good practice. Let's investigate if we can use MQTT over TLS. To do that though, we will need to use another MQTT broker.
CloudMQTT
CloudMQTT provides an MQTT broker as a service over at https://www.cloudmqtt.com/. The Cute Cat plan (I am not kidding) is free and is sufficient for our purposes. Subscribe to the service and, from the Control Panel, create a new instance. When the instance is created, click on Details to obtain connection information.
The CloudMQTT instance supports both unencrypted and encrypted connections and requires a username and password to connect. As an exercise to the reader, modify the previous Particle app with the connection information for your CloudMQTT instance and use the client.connect() function variant that supports a username and password.
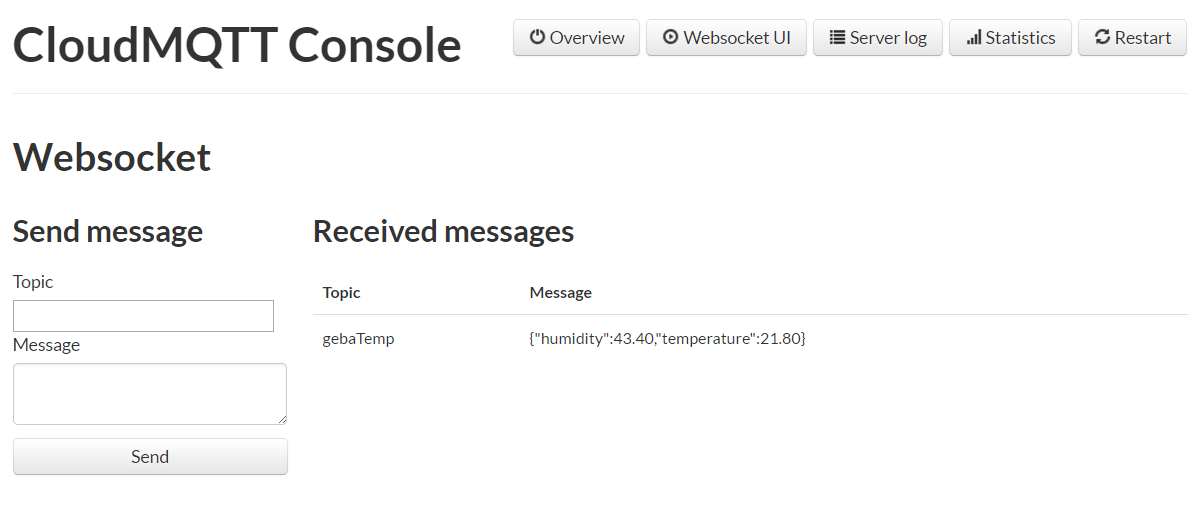
Note that CloudMQTT also has a WebSockets client that displays all incoming messages:
 With the knowledge about CloudMQTT, we can now turn to writing device code that connects to MQTT over an encrypted connection.
Using the MQTT-TLS library
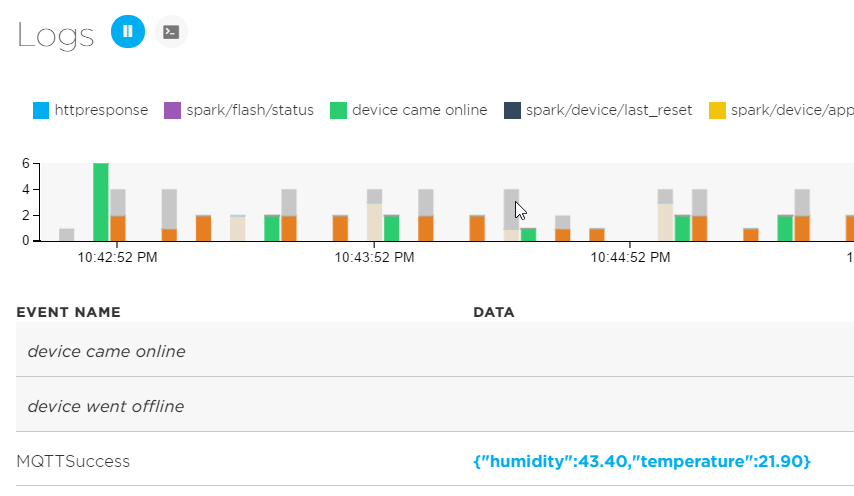
Using TLS from devices like the Particle Photon is challenging. Although the Photon hardware is powerful enough to support TLS, Particle does not provide robust libraries to do so from user code. Thankfully, there is an MQTT-TLS library written by a community member that works but your mileage may vary. During execution of the code, the Photon regularly loses connection with the Particle Cloud which manifests itself in the console:
 For reference, the code that uses MQTT-TLS is listed below. It is comprised of two files:
- mqttsapp.ino: source code
- cert.h: the certificate of the root CA that issued the certificate used by CloudMQTT
Here is mqttsapp.ino (replace YOURINSTANCE, YOURPORT, YOURUSER and YOURPASSWORD with the values you find on the CloudMQTT dashboard for your instance):
// This #include statement was automatically added by the Particle IDE.
#include <MQTT-TLS.h>
#include "cert.h"


// This #include statement was automatically added by the Particle IDE.
#include <SparkJson.h>

// This #include statement was automatically added by the Particle IDE.
#include <Adafruit_DHT.h>

#define DHTPIN 1 // what pin we're connected to

#define DHTTYPE DHT22 // DHT 22 (AM2302)


// root ca cert used by Cloud Mqtt
const char cloudMqttPem[] = CLOUD_MQTT_PEM;

// preallocated memory to reserve on the stack; use 200 bytes
StaticJsonBuffer<100> jsonBuffer;

// create a JSON object
JsonObject& root = jsonBuffer.createObject();

// Variables for humidity and temperature
double h, t;

DHT dht(DHTPIN, DHTTYPE);

// MQTT callback
void callback(char* topic, byte* payload, unsigned int length);

// MQTT client
MQTT client("YOURINSTANCE.cloudmqtt.com", YOURPORT, callback);


void setup() {
    dht.begin();

    // Setup Particle variables
    Particle.variable("temperature", t);
    Particle.variable("humidity", h);

    // enable TLS
    client.enableTls(cloudMqttPem, sizeof(cloudMqttPem));

    // connect to MQTT server
    client.connect("particle_dust", "YOURUSER", "YOURPASSWORD");

    // MQTT subscribe
    if(client.isConnected()) {
        client.subscribe("gebaParticle");
        Particle.publish("MQTTSuccess","Initial Connect", 60, PRIVATE);
    }


}

void loop() {
    // Wait a few seconds between measurements.
    delay(10000);

    // Reading temperature or humidity takes about 250 milliseconds!
    // Sensor readings may also be up to 2 seconds 'old' (its a
    // very slow sensor)
    h = dht.getHumidity();
    // Read temperature as Celsius
    t = dht.getTempCelcius();

    // Check if any reads failed and exit early (to try again).
    if (isnan(h) || isnan(t)) {
        return;
    }

    // fill JsonObject
    root["humidity"]=h;
    root["temperature"]=t;

    // generate the JSON string
    char output[100];
    root.printTo(output, sizeof(output));

    if(client.isConnected()) {
        client.publish("gebaTemp", output);
        client.loop();
        Particle.publish("MQTTSuccess", output, 60, PRIVATE);
    } else {
        Particle.publish("MQTTError", "Not Connected", 60, PRIVATE);
        client.connect("particle_dust", "YOURUSER", "YOURPASSWORD");
    }

    // report free memory
    uint32_t freemem = System.freeMemory();
    Particle.publish("MQTTMemory", String(freemem), 60, PRIVATE);
}

// MQTT call back function
void callback(char* topic, byte* payload, unsigned int length) {
    char p[length + 1];
    memcpy(p, payload, length);
    p[length] = NULL;

    // publish the payload to Particle
    Particle.publish("MQTTcallback", p, 60, PRIVATE);

    delay(1000);
}
Here is the cert.h file:
#define CLOUD_MQTT_PEM                                                  \
"-----BEGIN CERTIFICATE----- \r\n"                                      \
"MIIFMDCCBBigAwIBAgIQV5SFWjNqKQ7ivjk88Axt3zANBgkqhkiG9w0BAQsFADBv\r\n"  \
"MQswCQYDVQQGEwJTRTEUMBIGA1UEChMLQWRkVHJ1c3QgQUIxJjAkBgNVBAsTHUFk\r\n"  \
"ZFRydXN0IEV4dGVybmFsIFRUUCBOZXR3b3JrMSIwIAYDVQQDExlBZGRUcnVzdCBF\r\n"  \
"eHRlcm5hbCBDQSBSb290MB4XDTE0MTIyMjAwMDAwMFoXDTIwMDUzMDEwNDgzOFow\r\n"  \
"gZQxCzAJBgNVBAYTAkdCMRswGQYDVQQIExJHcmVhdGVyIE1hbmNoZXN0ZXIxEDAO\r\n"  \
"BgNVBAcTB1NhbGZvcmQxGjAYBgNVBAoTEUNPTU9ETyBDQSBMaW1pdGVkMTowOAYD\r\n"  \
"VQQDEzFDT01PRE8gU0hBLTI1NiBEb21haW4gVmFsaWRhdGlvbiBTZWN1cmUgU2Vy\r\n"  \
"dmVyIENBMIIBIjANBgkqhkiG9w0BAQEFAAOCAQ8AMIIBCgKCAQEApe7aGrg+6WaE\r\n"  \
"MyvsWocOnfpDXsxsmrOezwlTbnGbsFkuEU4wuOIVLaL2F4H5gX9fFinG7AFz7tdG\r\n"  \
"6wq0if2JvKj4us9ewrm+NPvu/pAKAXcr4TavNHLBXeUWdpLCjP/gaAev9W3O07l4\r\n"  \
"X8jxZ0DBh1hPUnVyGKUveZCwBAGPasSYlQfo4PcLPilqW/vHZCCOV8l8HW0CeuPO\r\n"  \
"VPAIZYaXicngMuyRGo790YSj759Gu8wAMHxMBelVSbBwgb1gAYqANFuLJQvC57oW\r\n"  \
"XYa8w/zKn/QJWkkfwkLyqNwhSbnQuoQByVSsGTf2ItQQzzQS+5nl1bF2pTZQfK7Q\r\n"  \
"W36GGtK2AwIDAQABo4IBoDCCAZwwHwYDVR0jBBgwFoAUrb2YejS0Jvf6xCZU7wO9\r\n"  \
"4CTLVBowHQYDVR0OBBYEFB6sP/wP4Sf1OpwFluiLM3n3dXnxMA4GA1UdDwEB/wQE\r\n"  \
"AwIBhjASBgNVHRMBAf8ECDAGAQH/AgEAMB0GA1UdJQQWMBQGCCsGAQUFBwMBBggr\r\n"  \
"BgEFBQcDAjAbBgNVHSAEFDASMAYGBFUdIAAwCAYGZ4EMAQIBMEQGA1UdHwQ9MDsw\r\n"  \
"OaA3oDWGM2h0dHA6Ly9jcmwudXNlcnRydXN0LmNvbS9BZGRUcnVzdEV4dGVybmFs\r\n"  \
"Q0FSb290LmNybDCBswYIKwYBBQUHAQEEgaYwgaMwPwYIKwYBBQUHMAKGM2h0dHA6\r\n"  \
"Ly9jcnQudXNlcnRydXN0LmNvbS9BZGRUcnVzdEV4dGVybmFsQ0FSb290LnA3YzA5\r\n"  \
"BggrBgEFBQcwAoYtaHR0cDovL2NydC51c2VydHJ1c3QuY29tL0FkZFRydXN0VVRO\r\n"  \
"U0dDQ0EuY3J0MCUGCCsGAQUFBzABhhlodHRwOi8vb2NzcC51c2VydHJ1c3QuY29t\r\n"  \
"MA0GCSqGSIb3DQEBCwUAA4IBAQCsPFl52og0fw7ZBzEwE0vqi8k2JA/nlQCkXv3A\r\n"  \
"rJ8aSqmXjuAwmXUXfZlnaZMWz8nVcT+DnmxWGeqCSqtB3Fvgtmg7fO22aGAJ3H/I\r\n"  \
"zTxPd0x+1BebdDpOB3XS/It5Wt8FGKtnJtM+jG76ESoy5DpwTHdwi+ZF9bDlJkBJ\r\n"  \
"NwImRkjJWMMPPIJsWE03d2qs6KjxBD/B11wf+aevKFIQ0dN6pt7Gc/0AepKDRW83\r\n"  \
"+7eYEqUoBfjcoeK86NSDwpHSXIqaVa3p0SFlSQ16VYE0YWHCPvCzI4bZJGlePq4g\r\n"  \
"z5Z2KDJ4sJ7bbAtAU44vI1wTv2aFpY45RAIS4nAFjvwYPRVY\r\n"                  \
"-----END CERTIFICATE----- "
Obtaining the certificate in PEM format and including it in the header (.h) file takes a bit of work. First, obtain information from CloudMQTT including a link to the root CA certificate with the following command:
echo | openssl s_client -showcerts -servername api.cloudmqtt.com -connect api.cloudmqtt.com:443 2>/dev/null | openssl x509 -inform pem -noout -text
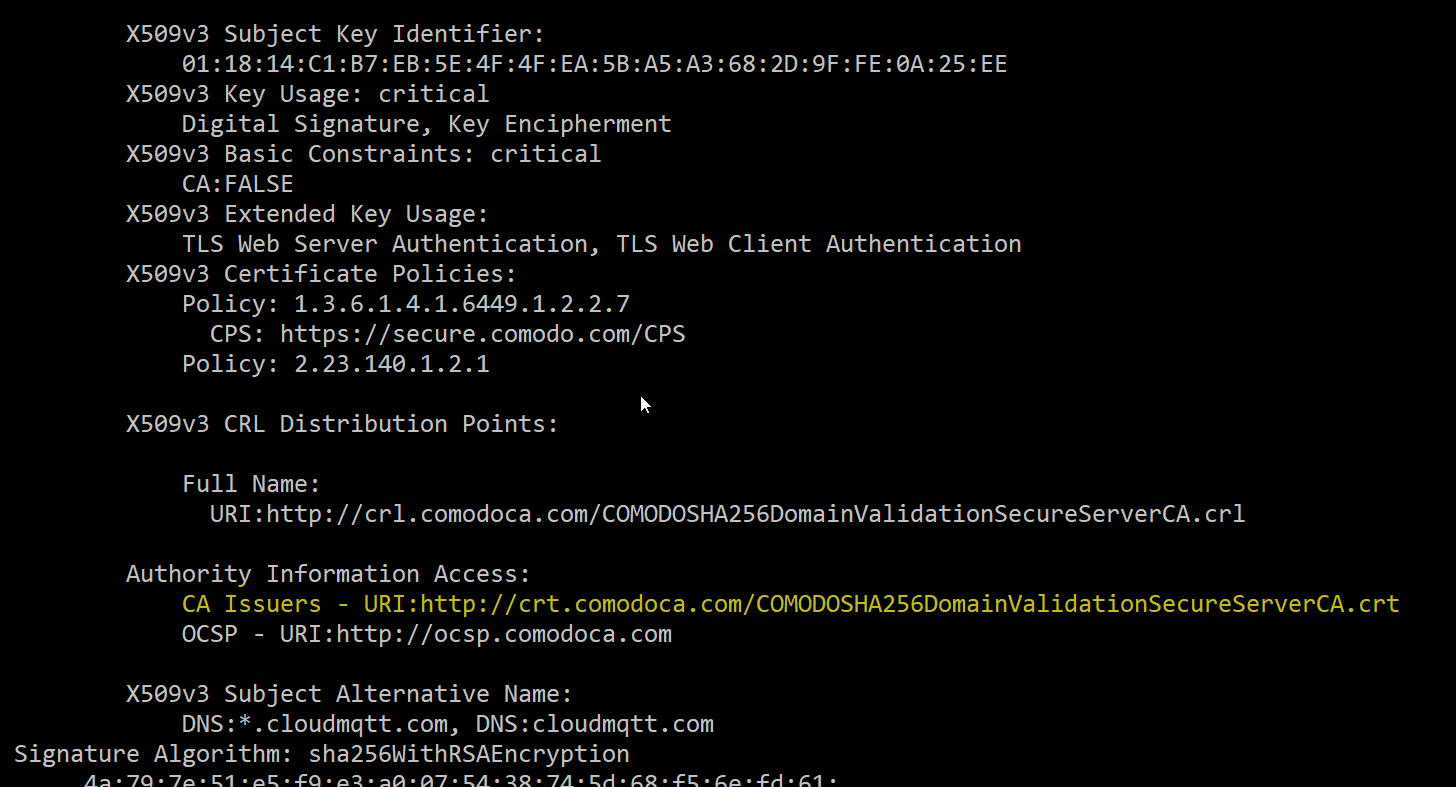
In the output, find the link to the root CA (marked in yellow):
Download the root certificate and save it as a base-64 encoded certificate. Then, convert it to PEM format with:
openssl x509 -in mycert.crt -out mycert.pem -outform PEM
You can now use the contents of the .pem file to create the cert.h file. Note that the TLS code in MQTT-TLS allows an invalid certificate. In other words, if the CloudMQTT certificate expires, the code will continue to work. If you want to check the validity of the certificate anyway, you can use the client.verify() method.