Creating a Mobile App
Time to have some fun and create a mobile app that consumes our REST API. The fact that our API, for now, does not require authentication makes the mobile app relatively straightforward. The mobile app will be created with Ionic Framework, and we will also use the fantastic Ionic Creator to quickly build the user interface and write some code. Ionic Creator has a free version that allows you to create one project and export the code to continue building the application on your development machine. The screenshot below shows the Ionic Creator experience:
User Interface
When you create a new project in Ionic Creator, use the settings below:

We start from a blank template and we use Ionic 1 instead of Ionic 3. Creator support for Ionic 3 is still in the alpha stage. Note that Ionic 1 is very different from Ionic 3 because Ionic 1 uses AngularJS where Ionic 3 uses Angular 3. Or was it Angular 4, or 5, or... I don't know about you but I tend to lose track of Angular versions these days.
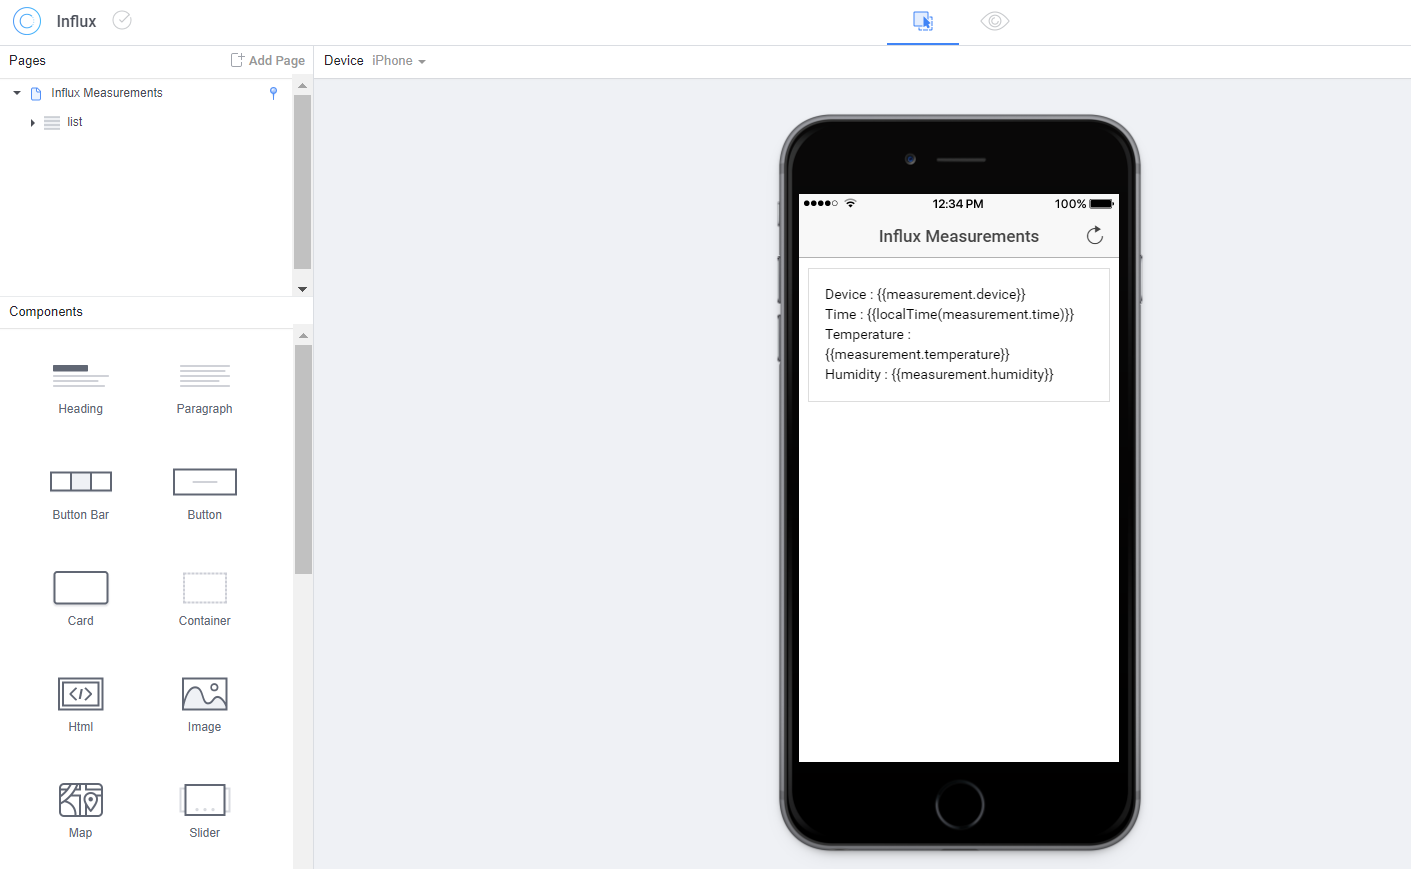
Anyway, when you see the empty iPhone picture, you can start building the user interface. Select the single page from the Pages box and, in the properties of the page, do the following:
- set the title of the page; I used Influx Measurements
- enable the Right Header Button and use the ion-ios-refresh-empty icon
- add an Angular directive to the page called ng-click; next to ng-click type submit(); use the <-> icon to place the directive in the right header button (button HTML element)
Obviously, we still have to write the submit() function. That function will do the actual call to the REST API and populate the rest of the page with the results.
Under the header, drag a List and, inside the List, drag a Container List Item. In the properties of the Container List Item, add an ng-repeat directive and in the text box next to it, type measurement in data as shown below:
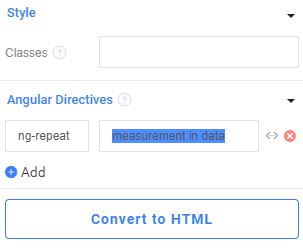
The variable data is an array that will hold the return values of a call to the Influx REST API. Using ng-repeat here just repeats the Container List Item for each item in the array. Each item can be referenced with measurement like in measurement.device.
It is not very useful to repeat the Container List Item without displaying something in each item. To do so add four markdown components in the Container List Item and use the text below:
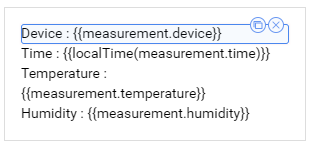
We are using measurement which comes from measurement in data of our ng-repeat directive.
Wiring it all up with code
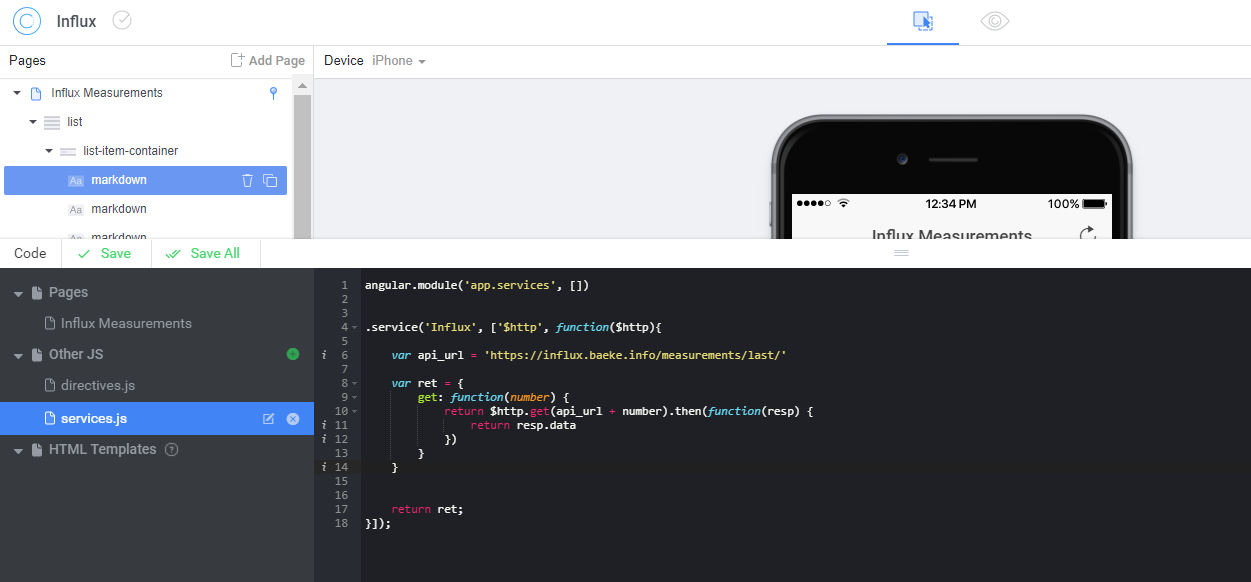
Click Code at the bottom left of the screen to open the code editor:
 We will do two things:
- write an AngularJS service that calls the API at http(s)://host/measurements/last/number where number is a parameter we can set when we call the service. In the screenshot above, we use https:// with a fully qualified domain name but in our example, use the IP address of the influx-rest Kubernetes service and http
- in the controller of the page, above Influx Measurements, define our $scope and methods to call from the page like submit()
The service is shown below (services.js):
angular.module('app.services', [])


.service('Influx', ['$http', function($http){

    var api_url = 'https://influx.baeke.info/measurements/last/'

    var ret = {
        last: function(number) {
            return $http.get(api_url + number).then(function(resp) {
                return resp.data
            })
        }
    }


    return ret;
}]);
The service Influx is defined and has the $http service injected. We use $http to interact with HTTP resources. In our case, we need to do an HTTP GET to our service. The methods of our service are encapsulated in an object called ret and returned. I have chosen to define one method, last, to retrieve the last measurements. The amount of measurements to retrieve is set with a parameter to the last method. If this is new to you, I recommend taking a look at https://www.w3schools.com/angular/angular_http.asp.
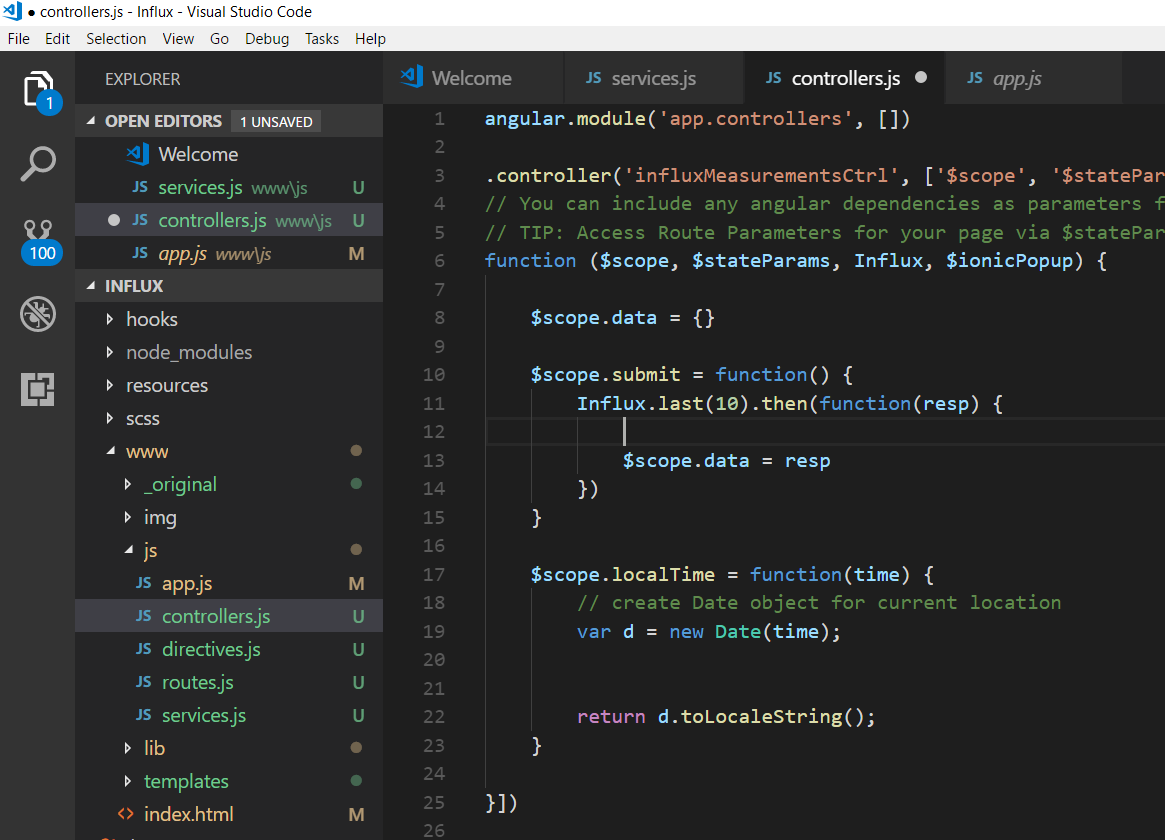
Let's see how to use this service (controllers.js, in the Creator Interface named Influx Measurements):
// The following is the constructor function for this page's controller. See https://docs.angularjs.org/guide/controller
// You can include any angular dependencies as parameters for this function
// TIP: Access Route Parameters for your page via $stateParams.parameterName
function ($scope, $stateParams, Influx) {

    $scope.data = {}

    $scope.submit = function() {
        Influx.last(10).then(function(resp) {

            $scope.data = resp
        })
    }

    $scope.localTime = function(time) {
        // create Date object for current location
        var d = new Date(time);


        return d.toLocaleString();
    }

}
Because we want to use our Influx service, you have to inject it by specifying it as a parameter to the controller function. The AngularJS $scope variable is used and $scope.data is set to an empty object. When we click the refresh icon, the $scope.submit function is called and that function calls the last method of the Influx service. The JSON response is stored in $scope.data. The other function is just a simple helper function to display the time and data correctly.
Running the app
If you use http and the IP address of your Kubernetes service, and you try to run the app in Creator by clicking the Eye icon, you will notice that the refresh button does not work. If you open the browser's developer console, you will notice an error as well. In Google Chrome:
Mixed Content: The page at 'https://creator.ionic.io/app/designer/def5b0b1539c' was loaded over HTTPS,
but requested an insecure XMLHttpRequest endpoint 'http://ip-address/measurements/last/10'.
This request has been blocked; the content must be served over HTTPS.
Because Ionic Creator is using https, you cannot make a call to an insecure endpoint. To be able to test this application, we will continue development on our local workstation
From Ionic Creator to your Desktop
Ionic Framework uses HTML5, CSS and JavaScript to build so-called hybrid mobile apps. This means we can also test and run the application in the browser. To bring a Creator app to your desktop, first install Ionic. Go to https://ionicframework.com/getting-started to find out more about installation. You will need NodeJS as well!
After installation, you can use the ionic executable to create a new project. From the command prompt, in a folder where you want to create the Ionic application,, type the following command:
ionic start Influx blank --type=ionic1
When the command finishes, you end up with a folder called Influx. Open that folder in your favorite code editor:
 Your www folder will look a bit different because it contains the starter code for a blank project. We need to export the Ionic Creator application to a zip archive and replace the files in the www folder with the files from the zip archive.
To obtain the zip archive, in Ionic Creator, click the Export Your App button in the top right section of the screen. You will also find that option on the dashboard.
When you have replaced the files, open a command prompt and type ionic serve. A development web server will be started and your app will be shown:

Retrieving the measurements over http now works because the development server also uses http!
You can also test the application on your mobile device. With recent versions of Ionic, you see the following output when your run ionic serve:
Starting server (address: 0.0.0.0, port: 8100, dev server port: 53703, livereload port: 35729) - Ctrl+C to cancel
[OK] Development server running!
     Local: http://localhost:8100
     External: http://<IPaddress>:8100, http://IPaddress:8100, http://IPaddress:8100
     DevApp: Influx@8100 on <computername>
Notice the last line that begins with DevApp? If you download Ionic DevApp from the iOS or Android App Store you will see this project in the app if your mobile device is on the same network as your development workstation. Pretty cool no?
In this section, you saw how to create a mobile app prototype quickly and easily using Ionic Creator. It takes much more work to create a fully functioning app with more configuration options, more screens and graphics. For now though, we will leave the app in this state and create enhancements as we go along.